Automated workflows in Parle are built using three main components: triggers, actions, and conditions. These elements work together to automate your communication and engagement strategies.
Triggers
Triggers are the starting points for your workflows. When a specified event occurs, the workflow begins. Parle offers two types of triggers:
- Parle-Managed Triggers: These triggers are based on data the system automatically collects and analyzes. Examples include a user’s status changing to “CHURNING,” a user beginning to “slip” (indicating disengagement), or a user being identified for the first time. The first-time user trigger is particularly useful for initiating onboarding sequences.
- User-Controlled Triggers: These triggers are activated by specific data you send to Parle. For instance, you can start a workflow when a new tag is applied to a user’s profile, or when a user meets a specific product usage filter, such as not performing a certain action in the last 21 days.
A single trigger can initiate multiple automation workflows simultaneously.
Actions
Actions are the tasks Parle executes at a specific step within a workflow. Actions are diverse and can include:
- Sending emails or in-app messages.
- Updating user tags.
- Enrolling users in a feature flag (turning a feature on or off for them).
It’s recommended to create your individual actions (e.g., specific email content, in-app messages) before you begin building your workflow. This approach streamlines the workflow creation process when adding steps.
To add a new step to your workflow, click the "+" button at the bottom of the last workflow node.
Parle also includes a special “Delay” action, which pauses the workflow’s execution for a specified duration (hours, days, weeks, or months).
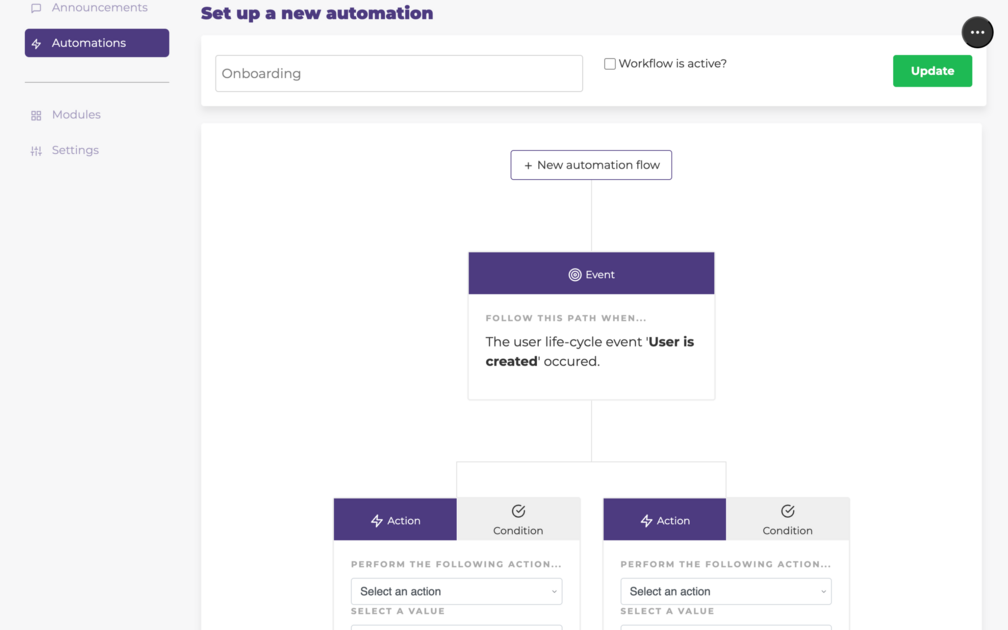
Conditions
Conditions allow you to create precise branching logic within your workflow, based on criteria related to user identification data or tracked user behavior within your application.
Conditions can range from simple checks, such as “does this user have this tag?”, to more complex evaluations, like “did this user perform action X within Y timespan?”.
When you add a condition, two new nodes will appear below it: the left path represents the “true” outcome, and the right path represents the “false” outcome. You can continue to build out each branch independently, even adding more conditions to create sub-branches.
Deleting a condition’s “true” or “false” branch will delete the entire condition node and its corresponding paths. Think of a condition as a three-node unit (the condition itself and its two branches); deleting any one part of this unit will remove the other two.
Important Considerations
- Ensure the workflow is marked as enabled for it to start running.
- All workflow changes are auto-saved.
- Individual workflow nodes can be edited at any time.
- Deleting a node will also delete all its child nodes (any subsequent steps in that branch).
- You must explicitly define whether a user can re-enter the same workflow multiple times.